Offshore Staff Access - Launch And Use Citrix Workspace Applications
Requesting an SCU Non-Standard Account
Offshore staff members will need an SCU Non-Standard Account to authenticate into the Citrix apps included in this knowledge base article.
To Request an NSA, please following the article How do I arrange a Non-Standard Account (NSA)?
Note: Only an SCU staff member can request an NSA
IMPORTANT: In the Proposed account holder's relationship with SCU?, please select 'Offshore Student Administration staff'.
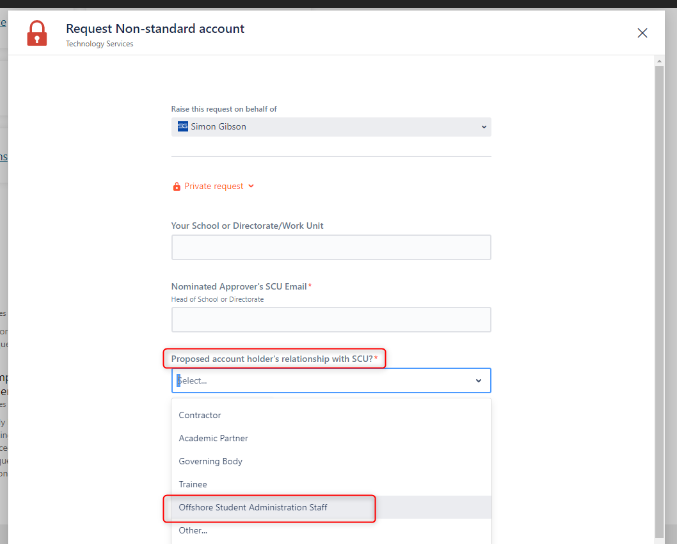
Additionally tick the 'VPN Access' tick box under access requested
Download and installing the FortiClient VPN
To download, install and use the FortiClient VPN please follow the link below.
https://learn.scu.edu.au/bbcswebdav/xid-12800836_4
Installing the VPN
Step 1a: Check for the FortiClient VPN program is installed on your SCU Laptop - click the Windows key ![]() and typing "FortiClient"
and typing "FortiClient"
Please NOTE: your SCU laptop may already have Forticlient installed - Laptops <2 years old have the FortiClient VPN installed as a part of the setup before you recieve it)
If the FortiClient VPN is not installed, go to Step 1b.
Step 1b: Click here to download the VPN launcher
The installer will appear for download. Select Save to download if it doesn't happen automatically


Step 3: You may receive this notification window. You need to select More Info and then Run Anyway


Step 4: Select the box Yes I have read and accepted the License agreement'to proceed with the installation.

Step 5: Follow the directions on the screen of the installer, click Next, then Next again, Install and Finish to complete the install.

Using the VPN
This article will show you how to install the FortiNet VPN on your Windows PC.
Currently the supported Operating Systems for FortiClient include: Windows 7 or higher
Step 1a: Check for the FortiClient VPN program is installed on your SCU Laptop - click the Windows key ![]() and typing "FortiClient"
and typing "FortiClient"
Please NOTE: your SCU laptop may already have Forticlient installed - Laptops <2 years old have the FortiClient VPN installed as a part of the setup before you recieve it)
If the FortiClient VPN is not installed, go to Step 1b.
Step 1b: Click here to download the VPN launcher
The installer will appear for download. Select Save to download if it doesn't happen automatically
Step 3: You may receive this notification window. You need to select More Info and then Run Anyway
Step 4: Select the box Yes I have read and accepted the License agreement'to proceed with the installation.
Step 5: Follow the directions on the screen of the installer, click Next, then Next again, Install and Finish to complete the install.
Requesting Access to CRM
Downloading, installing and using Citrix Workspace
Download the Citrix client
The latest version of the client as of 5/09/2023 is here
https://www.citrix.com/downloads/workspace-app/windows/workspace-app-for-windows-latest.html
Accept all defaults (do not tick any boxes like single sign on etc that are not already ticked)
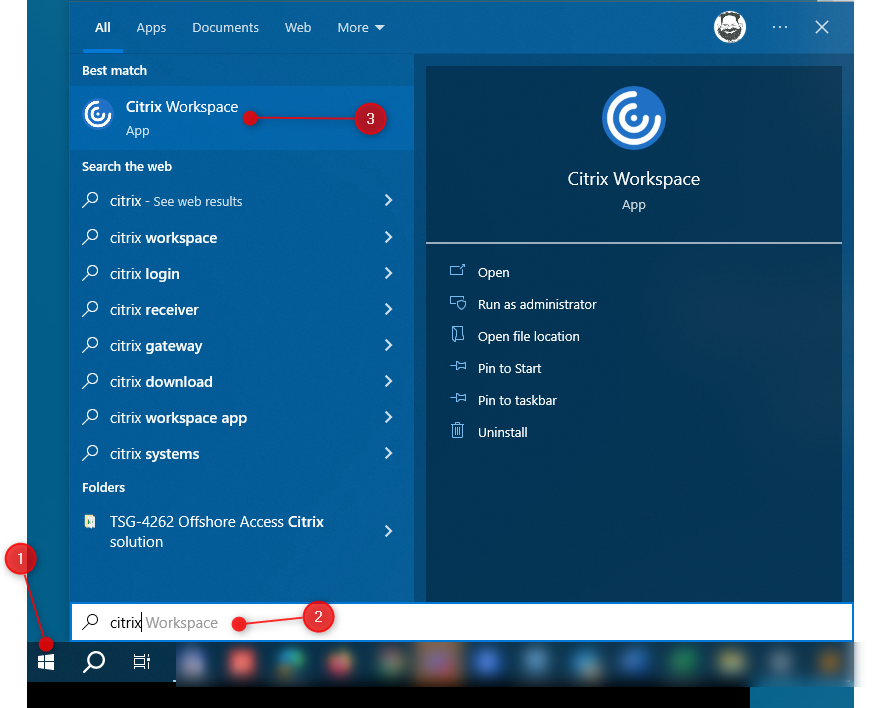
When installed you can run citrix workspace by clicking the start button and typing citrix.
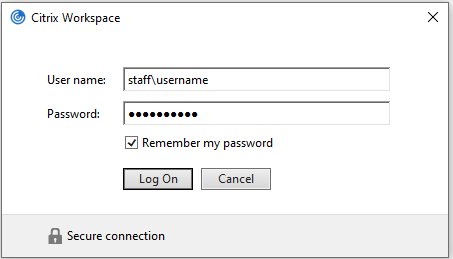
When the app loads it may ask for username and password if it does enter your scu account details. Ensure you tick remember my password and your username should be preceded by staff\
If it prompts for a server or URL enter the following:
Opening the Student Management System and CRM from Citrix Workspace.
Rather than navigating to the SM/CRM through your browser, instead open the Citrix Workspace application on your computer, if you do not have this please refer to 'Download Citrix Workspace above' before moving onto the next step.
Step 1: Click your Windows Start Key >> Start Typing "Citrix Workspace" >> Click on the Icon
Step 2: Citrix Workspace Opens >> Select "Apps" from top Menu >> Click the start on "Email" and "Student One" to add to your Favorites.
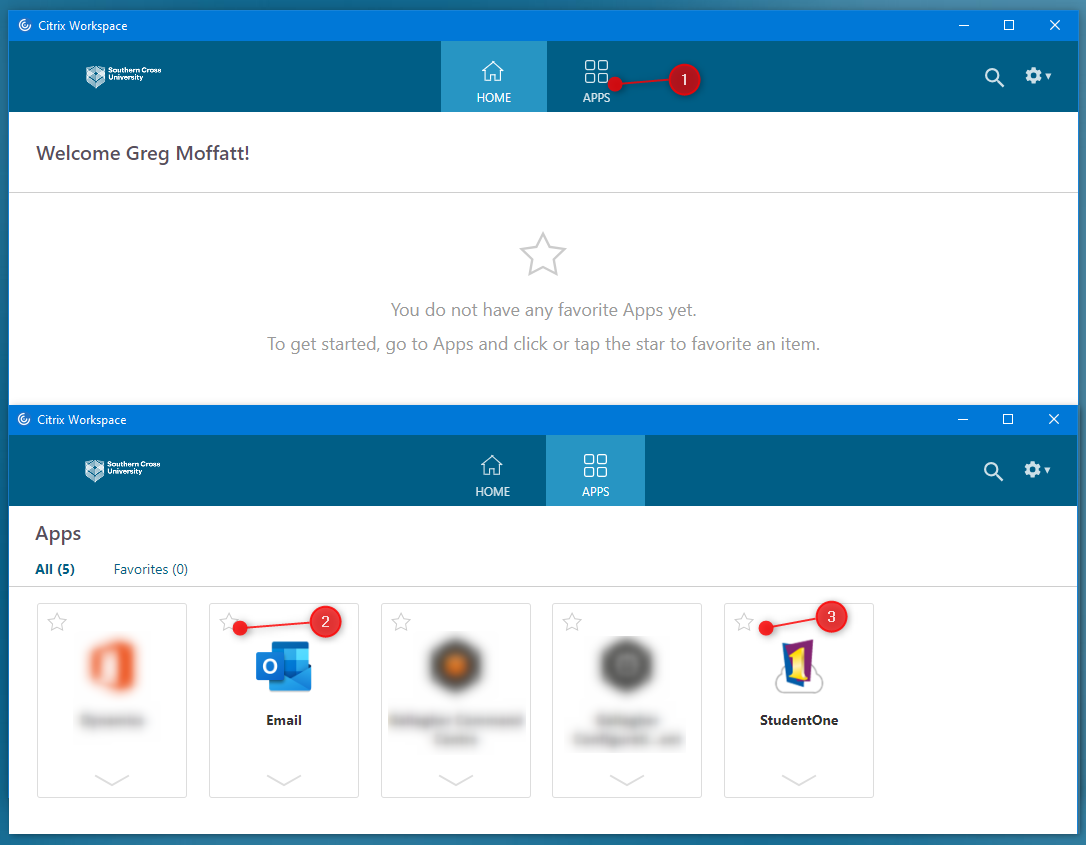
Step 3: To Open App, Click on Tile (or down arrow >> Open), (2) Citrix App will start, (3) Enter your SCU Credentials, (4) Click on Student Management
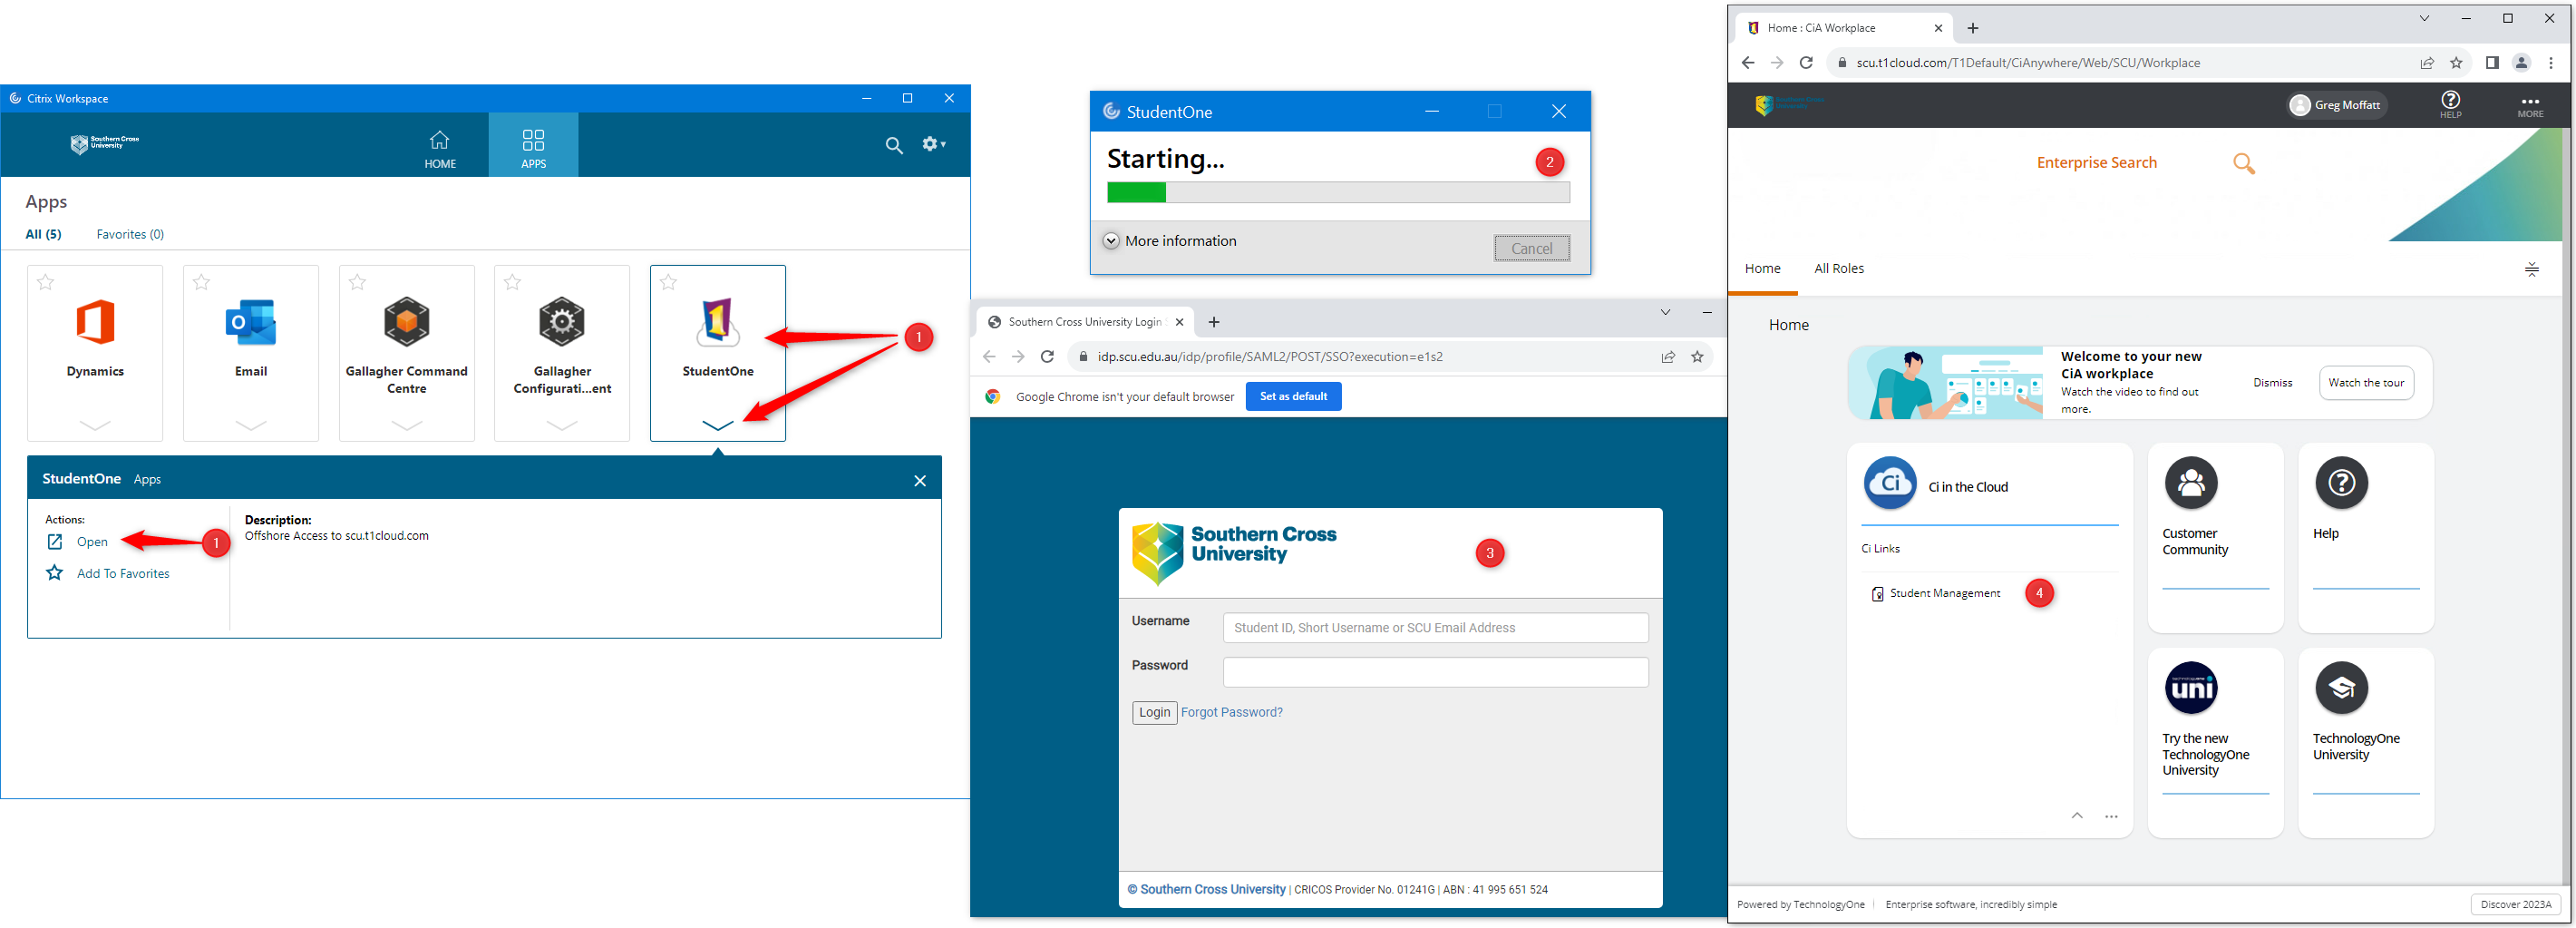
Once opened the Student Management System and CRM system will look the same as all other SCU staff members.